
XP1-ME Collage Project
Create a Photoshop collage of things that describe you and your interests. Create a new file in Photoshop of a size of
720 x 480 pixels (720 is width and 480 is height) with 72 resolution. You must cut out all the items you chose using the selection tool of your choice and layer mask. You must include a minimum of 25 images. Make sure to place each image on a separate layer. Save the file as last name + first initial + me.psd . When you are finished, save it again as a JPEG with the same name (ex. pettywme.jpg). Submit the .JPG file using the form on the right. This is an extra credit project - If you do not get to this project or finish this project that is ok, you can work on it and turn it in anytime during the quarter. |
|
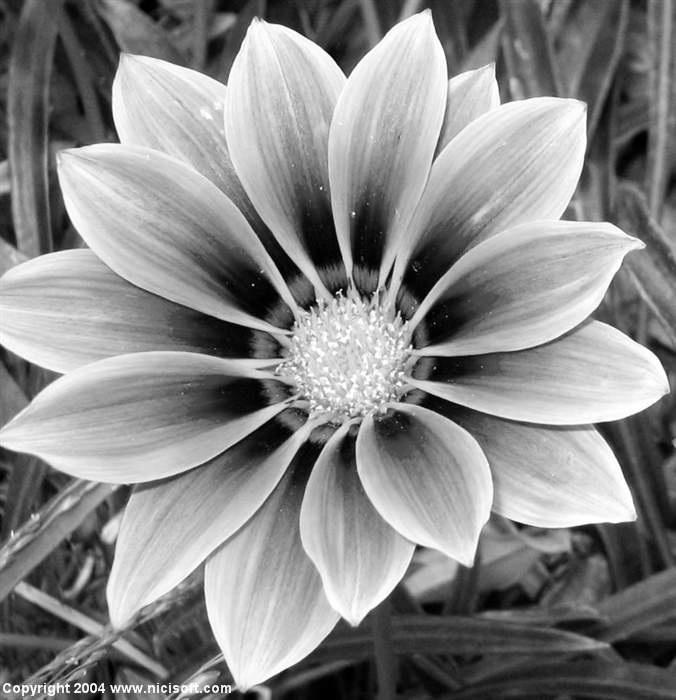
XP2-B/W Flower Project
Change this image of the black and white flower into a color image. Each pedal must be a different color (different shades of the similar colors) and the grass color must be painted as well.
Save the file as last name + first initial + flower.psd. When you are finished, save it again as a JPEG with the same name (ex. pettywflower.jpg). Submit the .JPG file using the form below. This is an extra credit project - If you do not get to this project or finish this project that is ok, you can work on it and turn it in anytime during the quarter. |
| ||
XP3-Splash of Color Project
Something that photographers and graphic editors make the big bucks doing is adding a splash of color to black and white photos. This technique adds interest and elegance to photos of weddings, nature, cute babies, and everything in between. In this project, you will apply the skills you learned in the Black & White Photo Project by adding a splash of color to a monotone picture of your choice. Choose an image of something that you like or will be a good example of your newly acquired skills.
Search on Google to find a black & white picture of your choice. Use selection and Quick Mask tools in Photoshop to color a few particular areas of the photo to add interest and bring life to the scene. Be sure to be very precise with your selection and coloring! As you work, save your project as a .psd and name it lastname + first initial + splash.psd. When you are finished, save it again as a JPEG with the same name (ex: pettywsplash.jpg) Submit the .JPG file using the form on the right. This is an extra credit project - If you do not get to this project or finish this project that is ok, you can work on it and turn it in anytime during the quarter. |
|
XP4-9 Box Warhol Project
Now that you've learned how to do the Warhol effect you can create an image with 9 instead of just 3. In this project, you are going to paint several renditions of a picture of yourself and arrange it in a grid. Use a different picture for this project. Do not use the same picture as the 3 across Warhol.
First you will use the on-board camera of the Apple iMac to take your picture. Be creative with your pose so your project will be appealing and interesting! You can also find an image on-line to use if you prefer. You will apply the same technique inside Photoshop to make it look like a black and white sketch, then use your selection and coloring techniques to create the Warhol effect. You want to have a minimum of 3 different colors per box. Remember to use bright colors! As you work, save your project as a .psd and name it lastname + first initial + 9warhol.psd. When you are finished, save it again as a JPEG with the same name (ex: pettyw9warhol.jpg) Submit the .JPG file using the form on the right. This is an extra credit project - If you do not get to this project or finish this project that is ok, you can work on it and turn it in anytime during the quarter. |
|
XP5-Picture Letters Project
Using the layer mask technique in Photoshop is often used for placing part of an image inside a particular selection on your canvas. A good example of this is fitting pictures inside letters of a word or phrase.
In this project, you will get a collection of pictures from the internet that represent who you are. We will practice using the layer mask technique by placing each of your images inside each letter of your first name. Start by creating a new document in Photoshop that is 1000 pixels wide and 250 pixels tall. Use the text tool ( T ) to type your name, then Layer>Rasterize>Type, then place a new image inside each letter using selection tools and masks. Be sure to maneuver the layer mask and picture so that the image is easily distinguishable and interesting. Add a Layer Style to the text to make it stand out and add a background behind the text that relates. As you work, save your project as a .psd and name it lastname + first initial + letters.psd. When you are finished, save it again as a JPEG with the same name (ex: pettywletters.jpg) Submit the .JPG file using the form on the right. This is an extra credit project - If you do not get to this project or finish this project that is ok, you can work on it and turn it in anytime during the quarter. |
|
XP6-Gradient Layer Mask Project
You have been hired as a graphic designer by Showcase Advertising Agency. They want to create two advertisements for upcoming events.
Use the directions from the Gradient Mask (Mozart) tutorial that demonstrates how to use gradients with a layer mask to create 2 advertising ads of different events of your choice. Create a new document 720 x 480 pixels in size. Find 3 images that relate to your event topic. Decide which image will be your background and move it onto the new document. Then move the other 2 images onto the background and blend the 3 images together using layer masks with gradient. Remember to be careful not to show the edges of the other images. Then create the transparency on the white title bar at the bottom and add an original catchy slogan to go with your ad. Use dafont.com to find a font that fits your target audience. As you work, save your project as a .psd and name it lastname + first initial +gmaskad1.psd (will be gmaskad2 for the second ad). When you are finished, save it again as a JPEG with the same name (ex: pettywgmaskad1.jpg) Submit the .JPG file using the form on the right. This is an extra credit project - If you do not get to this project or finish this project that is ok, you can work on it and turn it in anytime during the quarter. |
| ||
XP7-Studio Portrait Project
Professional photographers use a tarp or a background behind their subject when taking portraits of people or objects. There is a way to simulate this effect in Photoshop. There are two tutorials that will visually walk you through how to make a soft edge studio background and a tarp studio background. * Make a new file with size of 480 height x 640 width pixels, at 72 resolution. * For the soft edge background choose any 2 colors of your choice. * For the tarp background the 2 colors must be black and white. * Take a different pose picture of yourself using Photo booth for each background. * Drag your photos of yourself from Photo booth to the desktop and then you can open them in Photoshop. * Open the pictures of yourself and use the selection tools and layer masks to cut yourself out and place in the two backgrounds. You must use a different picture of yourself for each portrait. * Remember to clean up all edges nice and smooth. Use Transform if you need to resize yourself in the background to look better (you do not want to have too much headspace between the top of image and your head, make sure there is not a floating body, your body cut off point must be at the bottom of the portrait). * Once you have created your portrait, add text of your first name and last name somewhere on the image. Add a layer style to your text (ex. bevel and emboss, or outer glow, etc). As you work, save your project as a .psd and name it lastname + first initial +softedge.psd (will be tarp.psd for the second studio background). When you are finished, save it again as a JPEG with the same name (ex: pettywsoftedge.jpg) Submit the .JPG file using the correct form. This is an extra credit project - If you do not get to this project or finish this project that is ok, you can work on it and turn it in anytime during the quarter. |
| ||||
XP8-Stamps Project
Postal Stamps have marked American history through various designs over the years. Create a series of stamps based on a common theme (ex Sponge Bob).
Create a new file 174 x 200 pixels in Photoshop. All your stamps must have a common theme (if you choose cars, you must use cars for all your stamps, but you can use different types of cars). Make sure all stamps have a similar look. Make sure all cut out image edges are clean and smooth. Remember to add the price of the stamp (45 cents) and the letters USA to the stamp. Use Arial Black for the stamp price and USA lettering. Create 6 total stamps. Save the file as last name + first initial + stamp1, (stamp2, stamp3, etc.). As you work, save your project as a .psd and name it lastname + first initial +stamp1.psd (stamp2, stamp3, etc). When you are finished, save it again as a JPEG with the same name (ex: pettywstamp1.jpg) Submit the .JPG file using the form on the right. This is an extra credit project - If you do not get to this project or finish this project that is ok, you can work on it and turn it in anytime during the quarter. |
|
XP9-Digital Media Banner Project
Banners are used the professional world to showcase or display company information. Banners can be printed or on-line like those found on websites. You are going to create a web banner for Digital Media.
Create a new file 400 x 150 pixels. You are going to create a logo banner for Digital Media. Find at least 20 images on-line that represent what digital media is and what this class is about. Use Layer Mask to cut out each image. Combine these images on a background that you create using Filters in Photoshop to represent digital media. Finish the banner off by adding the text – Digital Media – in the font choice that you think best fits. Experiment with powerful and impactful fonts. Add layer styles to the text and to the images to make them stand out. As you work, save your project as a .psd and name it lastname + first initial +banner.psd. When you are finished, save it again as a JPEG with the same name (ex: pettywbanner.jpg) Submit the .JPG file using the form on the right. This is an extra credit project - If you do not get to this project or finish this project that is ok, you can work on it and turn it in anytime during the quarter. |
|
XP10-Graffiti Wall Project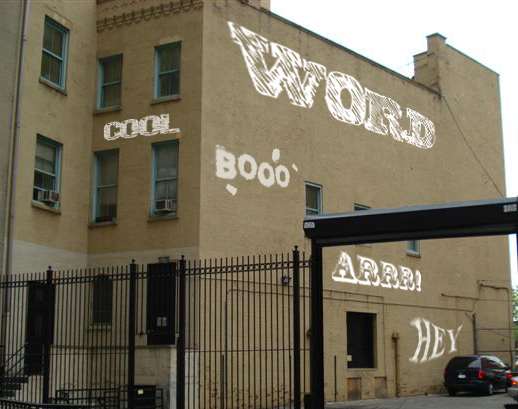
Graffiti can be found on walls and buildings throughout America. Sometimes it is an act of defacing property, but other times it is an art form. You are going to use the weblink to the right to complete the tutorial for creating graffiti on a wall. A few things different from the tutorial are the following: 1-Must find a wall that is at an angle to put the graffiti on 2-Text must be white (use dafont.com to come up with cool fonts) 3-Must have a least 5 different graffiti words (different fonts for each) 4-Must rasterize the type before you change perspective (Layer>Type>Rasterize) 5-Use distort with perspective under transform to get to look more realistic on the wall 6-Change the blending mode to overlay, adjust opacity as well to make more realistic As you work, save your project as a .psd and name it lastname + first initial +graffiti.psd. When you are finished, save it again as a JPEG with the same name (ex: pettywgraffiti.jpg) Submit the .JPG file using the form on the right. This is an extra credit project - If you do not get to this project or finish this project that is ok, you can work on it and turn it in anytime during the quarter. |
Tutorial Link |
XP11-Play Ball Project
Change the background color to any color other than white. Add in a text phrase with each letter animating to spell the words at the end. The duration of this project must be at least 60 frames.
As you work, save your project as a .fla and name it lastname + first initial + play.fla. When you are finished, export it as an SWF with the same name (ex: pettywplay.swf) Submit the .SWF file using the form on the right. This is an extra credit project - If you do not get to this project or finish this project that is ok, you can work on it and turn it in anytime during the quarter. |
|
XP12-MCHS PSA Project
You have been hired as an audio editor for Commercials Incorporated. They want you to edit a PSA for your local high school to raise awareness about local clubs and activities for students. They have provided you with the voice over (VO) and final script. In this project, you will edit a raw voice recording to match a script. Cut and splice clips in GarageBand, arrange the recording in the correct order. When you have matched the script, add at least two supporting sound effects and background music to make the production appealing and persuasive. Remember the background music should fit your target audience and not overpower the voice-over.
As you work, save your project as a GarageBand project file (.BAND) and name it last name +first initial + PSA. When you are finished, export it using Share>Export Song to Disk menu and choose the .MP3 encoder and name the output file the same name (ex: pettywPSA.MP3). Submit the .MP3 file using the form on the right. This is an extra credit project - If you do not get to this project or finish this project that is ok, you can work on it and turn it in anytime during the quarter. |
| ||||||

XP13-Photo Sketch Project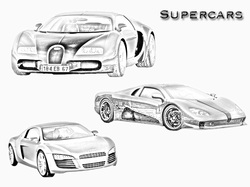
You are going to turn a photo collage into a sketch. You will create 2 different sketches. Find 3 similar images by topic of your choice on-line (ex. 3 basketball players or 3 cars, etc). Create a new file at 720 x 480 pixels and fill it with white. Combine the 3 images into the new image by cutting out to keep what you want and placing them on the white background. Click on this project link to view the tutorial on turning a photo into a sketch. Once your sketch effect is applied, use burn tool to add to any places that need to be darker. Finally add some text of a color that relates to your subject and add layer style effects to the text. Use dafont.com to get a good font type that fits.
As you work, save your project as a .psd and name it last name + first initial + sketch1, last name + first initial + sketch2. When you are finished, save it again as a JPEG with the same name (ex: pettywsketch1.jpg, pettywsketch2.jpg) Submit the .JPG file using the form below. This is an extra credit project - If you do not get to this project or finish this project that is ok, you can work on it and turn it in anytime during the quarter. |
| ||
XP13-License Tag Project
You are going to create a California license plate from scratch. Create a new file at 540 x 300 pixels and follow the tutorial on how to produce this effect. Download and load the fonts need for this project from the files on the right.
You choose what the text (letters and/or numbers) will read on your license tag. As you work, save your project as a .psd and name it lastname + first initial +license.psd. When you are finished, save it again as a JPEG with the same name (ex: pettywlicense.jpg). Submit the .JPG file using the form on the right. This is an extra credit project - If you do not get to this project or finish this project that is ok, you can work on it and turn it in anytime during the quarter.
|
| ||||||||
XP14- Other Extra Projects
You can select any of the following as extra credit or closing semester projects. Feel free to use any pictures and images are are school appropriate for these projects and not just the ones in the tutorials.
Pixel Characters Double Exposure Effect Fantasy Flaming Deer Glitch Photo Effect Album Artwork (Use a profile image of yourself or find one and a hat and texture online.) Book Design (Create your own book title and logo, using these techniques, put on this white and black covers) As you work, save your project as a .psd and name it lastname + first initial +(name of tutorial).psd. When you are finished, save it again as a JPEG with the same name (ex: pettyw"projectname".jpg). Submit the .JPG file using air drop to the instructor when you are done. |
| ||||
